
How to Hang Pictures Without Nails (Renter-Safe Methods)
This post contains affiliate links. If you buy through them we may earn a small commission at no extra cost to you. Read our full disclosure.
You want the art on the wall. You do not want to explain the holes to a landlord, patch drywall in a rental you are leaving in eight months, or drill into a wall that might be hiding a pipe.
Good news: modern adhesive hardware handles most residential artwork, and it does it without a single nail. The catch is that every method has a real weight limit and a specific surface it does not work on, and the product packaging is not always honest about either. Here is the full set of options, how much each one actually holds, and how to take it all down cleanly.
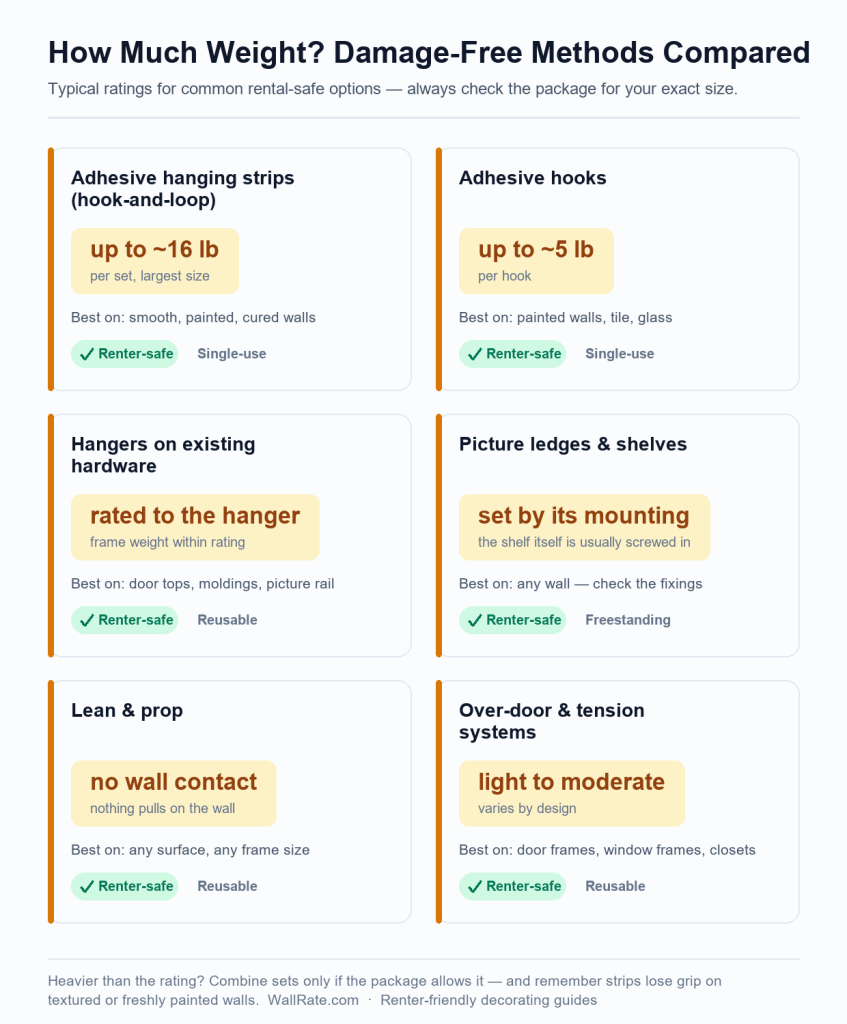
The methods, compared
| Method | Typical hold (check the label) | Best surface | Rental-safe | Reusable |
|---|---|---|---|---|
| Adhesive picture hanging strips (hook-and-loop) | A few pounds to about 16 lb per set, depending on size | Smooth, painted, cured walls and clean frame backs | Yes | No — strips are single-use |
| Adhesive hooks (wire-backed frame hangs on the hook) | A few pounds to about 5 lb per hook | Smooth painted walls, tile, glass | Yes | No |
| Damage-free hangers using existing hardware | Frame weight, within the hanger’s rating | Door tops, moldings, existing picture rail | Yes | Yes |
| Picture ledges and shelves | Set by the shelf’s mounting hardware | Any wall, but the shelf itself is usually screwed in | Only if it is freestanding or renter-mounted | Yes |
| Lean and prop | Unlimited (no wall contact) | Any | Yes | Yes |
| Over-door and tension systems | Light to moderate | Door frames, window frames, closets | Yes | Yes |
Weight ratings are per the manufacturer and vary by strip or hook size and by surface. The number printed on the package is the number to trust, and it assumes a correct installation. Never assume two small hooks equal one large one.
1. Adhesive picture hanging strips (the workhorse)
Hook-and-loop strips are the best option for most framed art, because the load is spread across the back of the frame instead of concentrated at one point.
Sizes you will see
- Small — for light, small frames. Think a single 5 × 7 or a light 8 × 10.
- Medium — the everyday size for typical 11 × 14 and 16 × 20 frames with glass.
- Large — heavier frames, larger glass, or canvas that has some weight to it.
The rule that matters: a “set” is two pairs of strips — one pair on the wall, one pair on the frame. The rating on the package applies to the set, not to each strip. If your frame is near the limit, go up a size rather than adding more small ones.
Step by step
- Count your strips. Heavier frames need more than one set: one set near the top and a second set lower down spreads the pull and keeps the frame from tilting forward.
- Clean the wall. Wipe with isopropyl alcohol and let it dry completely. Dust, grease and cleaning-product film are the main reasons strips fail.
- Clean the back of the frame the same way, especially on the areas that will take the strips.
- Press and hold for 30 seconds on each strip. Not five seconds. Thirty. Direct pressure is what activates the adhesive.
- Wait one hour before hanging. This is the step everybody skips and the reason things fall. The adhesive needs time to reach full bond strength.
- Mate the pairs and press the frame to the wall for 30 seconds. Then let go slowly and watch for movement.
- Wait 24 hours before you judge it. If a corner has pulled away by then, the surface is wrong for this method — switch to a hook or a different wall.
Do not use strips on: textured walls, wallpaper, freshly painted walls (wait 30 days), unpainted drywall, or anything warmer than room temperature such as above a radiator or inside a sunny window. Heat softens adhesive and gravity does the rest.
Picture hanging strips on Amazon →
2. Adhesive hooks
Hooks suit wire-backed frames, small mirrors, and anything you want to lift on and off. They are simpler than strips and easier to reposition — but they carry less weight and they leave a single point of contact, which is exactly where failure happens.
- Best for: light frames, lightweight decor, keys, small shelves.
- Watch the cure time: hooks typically want an hour on the wall before you hang anything, and some larger ones want longer. Read the package.
- Do not overload them because the hook looks big. A hook’s rating is its rating.
- Wire, not sawtooth, is the better match for hooks. A sawtooth hanger needs a flat nail head, not a J-shaped hook.
A useful trick for heavier pieces: put two hooks in the wall the same distance apart as the frame’s two D-rings and hang directly on the rings with wire removed. Two anchor points spread the load and stop the frame from swinging.
Damage-free adhesive hooks on Amazon →
3. Damage-free hangers that use existing hardware
These are the most underrated option for renters. Instead of touching the wall, they hook over something that is already there:
- Over-the-door hangers — a metal bracket that sits on top of a door and holds a frame on the door face. Zero wall contact, and they hold a surprising amount.
- Molding hooks — a slim hook that grips the top of a picture rail, a chair rail, or the lip of a molding. Very common in older apartments.
- Existing picture rail — if your apartment has one, use it. That is what it is for, and hooks for it cost almost nothing.
Because nothing is adhesive and nothing is drilled, these are fully reversible and reusable. The limitation is simply that you need the right piece of architecture to hook onto.
4. Picture ledges and shelves
A ledge holds frames leaning back against the wall instead of hanging them. It is a genuinely good look — a rotating gallery you can rearrange in seconds, and one lever to move the whole display.
The honest caveat: a ledge still has to attach to the wall, usually with two screws into studs or anchors. That means it is only “no nails” if you choose a freestanding ledge, or if your lease already allows a small number of anchors that get patched at move-out.
If you are willing to install one anchored shelf, this is the best value per unit of visual impact in a rental. If you are not, skip to the next section.
5. Lean and prop: the zero-damage option
No adhesive, no hardware, no holes. Frames simply rest on something.
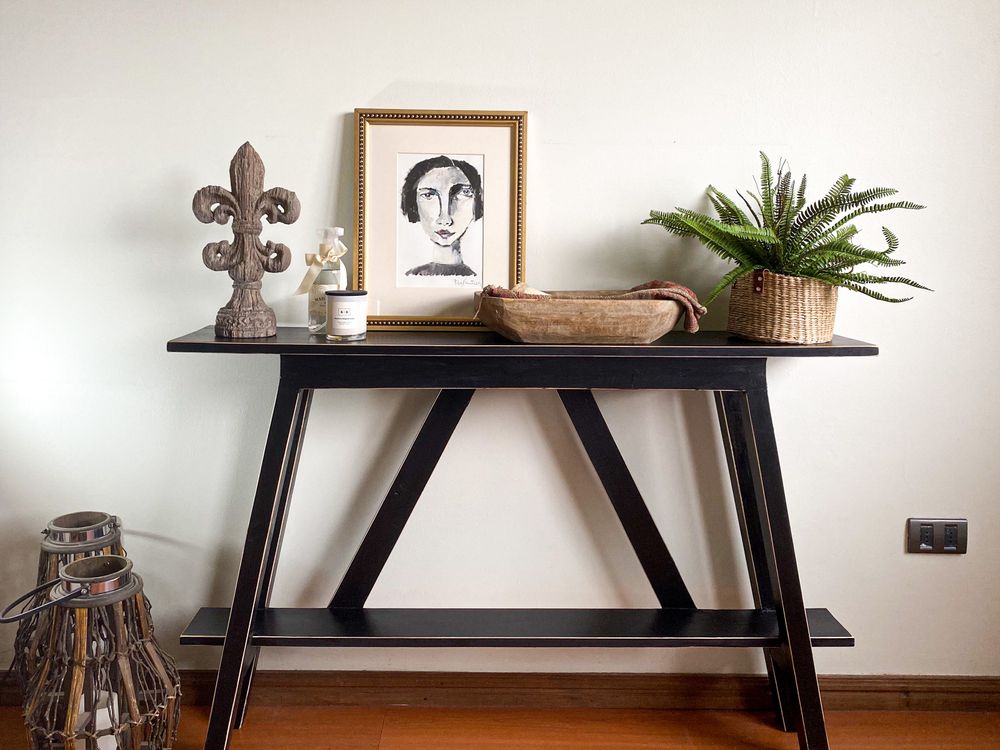
- On a console or sideboard, leaning back against the wall. Group two or three frames of different heights and let them overlap slightly.
- On the floor, oversized art leaning against the wall — a deliberate, informal look that works especially well in small apartments.
- On top of kitchen cabinets or a bookcase, where the wall above is otherwise empty.
- On a mantel or window sill.
Two practical notes: put a small adhesive bumper or a piece of felt on the frame’s bottom corners so it does not scratch the surface it leans on, and keep leaning frames out of walkways and away from anything that could knock them over.
6. Over-door and tension systems
Useful in the places you would not think to hang art: a closet door, a bathroom door, or a window frame.
- Over-door hooks turn a door into display space. Good for a small gallery in a bedroom.
- Tension rods inside a window frame can hold lightweight clips-paper prints without touching the wall — no drilling, and it disappears when you take it down.
- Command-style cord clips and hooks for stringing a lightweight line or a garland for seasonal decor.
Weight limits: how to read them without getting burned
The number on the package is a test result, not a promise about your wall. Four things change the real capacity:
- Surface type. Semi-gloss paint holds better than flat. Textured surfaces hold far less. Wallpaper, almost nothing.
- Temperature. Adhesive weakens as it warms. Above a radiator, in a sun-baked window, or in a hot room in summer, treat every rating as optimistic.
- Humidity. Bathrooms and kitchens are hostile to adhesive. Small, light, and well-pressed is the rule there.
- Time. A bond that holds for a month can let go in month six. Re-press edges when you notice them, and re-check anything hung near a heat source.
Practical rule of thumb: use no more than about two-thirds of the printed limit. If a set is rated to hold a certain weight, treat the safe working load as noticeably lower — especially on flat paint, in warm rooms, or in a rental where you cannot afford damage.
Surface prep: the 10 minutes that decide the outcome
- Wipe the wall with isopropyl alcohol and let it dry fully. This removes the invisible film that causes early failure.
- Wait 30 days after painting. Fresh paint has solvents still leaving the film, and adhesive will pull the paint with it.
- Work at room temperature. Cold surfaces and cold adhesive do not bond well. Warm the room first.
- Do not use adhesive on textured walls, wallpaper, or unpainted drywall. No technique fixes the wrong surface.
- Test a hidden spot first. Put one strip behind a bookshelf or inside a closet, wait a few days, then remove it. That test costs you one strip and tells you whether the whole plan is safe.
How to remove it without damage
Removal technique is where deposits are saved and lost.
- Never pry or pull straight outward. That is how paint comes off in a sheet.
- For strips, pull the tab straight down and keep pulling. The strip stretches to several times its length and releases gradually. Slow is the whole method.
- For hooks, press the release tab and pull the strip straight down, keeping your other hand against the wall above it to support the paint film.
- If it resists, warm it slightly with a hairdryer on low. Never use a heat gun.
- Clean residue with warm water and a drop of dish soap, then dry. A little rubbing alcohol handles stubborn adhesive.
- Keep the strips for the hardware swap — you cannot re-use them, but keeping the packaging helps you buy the same rating next time.
When a nail is actually the right answer
Adhesive is not always correct, and forcing it is how art falls on someone.
- The piece is heavy — a large mirror, a big glazed frame, a heavy canvas.
- The wall is textured, wallpapered, or freshly painted.
- It is a high-traffic spot where a fall could hurt someone.
- It is going above a bed, a crib, or a seating area where a failure matters.
In those cases, a proper anchor into a stud (or a rated drywall anchor) is the safer choice. If your lease allows it, a small number of well-placed anchors that you patch and touch up at move-out is a normal part of renting. Ask first, photograph everything, and keep the paint color your landlord used.
Frequently asked questions
How much weight can adhesive strips really hold?
It depends entirely on the strip size and the surface. Manufacturers publish a rating per size on the package, and the rating assumes a clean, smooth, cured painted surface at room temperature. On anything textured, in a humid room, or above a heat source, assume noticeably less.
Will adhesive strips damage the paint?
Not if the paint is fully cured and you remove the strip correctly — pulling straight down so the strip stretches, rather than prying it off. Damage happens on fresh paint, on flat chalky finishes, and when the strip is ripped outward.
Can I hang a mirror without nails?
Small, frameless or lightly framed mirrors, with the correct size strips and more than one set, can work. A large or heavy mirror should be anchored. If falling glass could hurt someone, use hardware.
How long can adhesive hooks stay on the wall?
Indefinitely in normal room conditions, as long as the load stays within the rating. Check them when the seasons change, since heat and humidity are what reduce bond strength over time.
What about hanging things on wallpaper?
Do not put adhesive directly on wallpaper — the adhesive bonds to the paper, and removing it takes the paper with it. Use an over-door hanger, a picture ledge, or a leaning arrangement instead.
Can I reuse the strips if I move?
No. Adhesive strips and hooks are single-use by design; the adhesive deforms when removed. Buy new ones sized for the new frame.
The bottom line
For most renters, the answer is picture hanging strips: clean the wall and the frame, press for a full 30 seconds, wait an hour before hanging, and keep the load to about two-thirds of the rating. Use hooks for light wire-backed pieces, over-door hangers where the architecture allows, and leaning arrangements when you want zero risk.
Deciding where the art should go? Our room-by-room chart for how high to hang pictures takes the guesswork out of it. If you are decorating the whole wall, start with removable peel and stick wallpaper for renters.
2 Comments